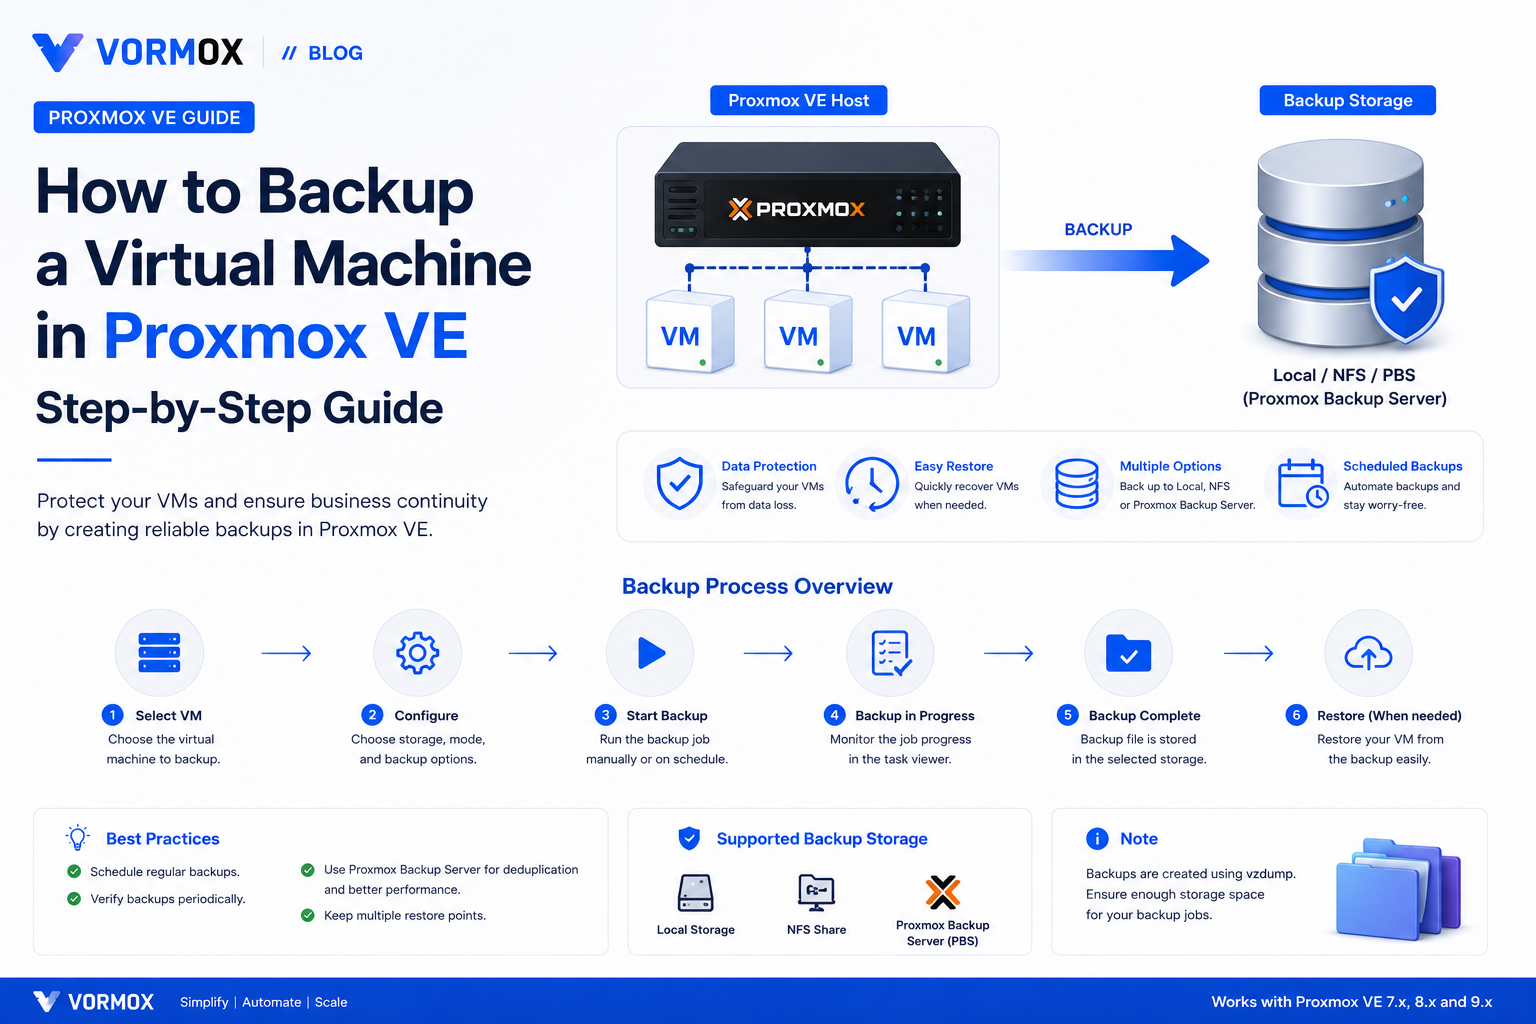
Introduction
You've got a VM running on Proxmox and it finally does what you need. Maybe it's a Pi-hole box, a Nextcloud instance, or a game server your friends actually use. None of that matters if a bad update or a failing disk wipes it out and you have no way to get it back.
That's what backups are for. Proxmox VE has a backup system built right into the platform, and you don't need a separate tool or a paid add-on to use the basics. This guide walks through setting up your first backup, running it, and — just as important — actually restoring from it.
We're using Proxmox VE 9.x for the screenshots and commands below, but everything here works the same on 8.x too. If you're on an older release the menus might be in slightly different spots, but the underlying tool hasn't changed much in years.
What You Will Learn
- What Proxmox's backup system actually does under the hood
- The difference between snapshot, suspend, and stop backup modes
- How to run a one-off manual backup from the web interface
- How to set up a recurring backup job so you stop forgetting
- How to run the same thing from the command line with
vzdump - How to restore a VM when things go wrong
- The errors you're most likely to hit and how to fix them
What Is This Feature?
Proxmox's backup engine is called vzdump. It's a command-line tool that the web GUI is really just a friendly wrapper around — every backup you kick off by clicking a button is running vzdump behind the scenes.
A vzdump backup isn't a partial copy of changed files. Every backup Proxmox creates is a full backup: your VM's configuration (CPU, RAM, disks, network cards) plus a complete copy of the virtual disks, bundled into one archive. There's no separate "first backup is full, later ones are incremental" behavior like you'd get with some enterprise backup tools — unless you're using Proxmox Backup Server, which handles deduplication differently and is worth a guide of its own.
Where that backup lands depends on your storage setup. You can point it at local disk, an NFS share, an SMB share, or Proxmox Backup Server (PBS), which is Proxmox's own dedicated backup appliance. PBS adds deduplication and incremental-feeling backups, but a plain directory or NFS storage works fine for a homelab and is what most people start with.
Why Would You Use It?
The honest answer: because eventually something breaks. A botched apt upgrade inside the guest, a corrupted filesystem, a fat-fingered rm -rf, a dead SSD in the host — any of these can take a VM down permanently. A recent backup turns a disaster into an annoyance.
It's also the safety net that lets you take risks. Testing a risky config change is a lot less stressful when you know you can restore to five minutes ago if it goes sideways. I treat backups as the thing that makes experimenting on a homelab actually fun instead of terrifying.
There's a secondary use too: backups double as a crude migration tool. Back up a VM on one node, restore it on another, and you've effectively moved it — no shared storage or clustering required.
Prerequisites
- A working Proxmox VE install (8.x or 9.x) with at least one VM or LXC container
- A storage location for backups — local disk with enough free space, an NFS/SMB share, or PBS
- Root or an account with the VM.Backup permission on the guest you want to back up
- Roughly 1.2x the size of your VM's used disk space free, as a rough safety margin for the backup file
If you haven't added any extra storage yet, the default local storage on a fresh install usually already allows backup files — you can check this under Datacenter → Storage, clicking your storage, and confirming Backups is ticked in the Content field.
Step-by-Step Tutorial
Step 1: Confirm your storage accepts backups
Go to Datacenter → Storage in the left-hand tree. Click the storage you plan to use and hit Edit. Look at the Content field — it needs VZDump backup file checked. Directory, NFS, and CIFS storages all support this; some block-level storages like plain LVM don't, since backups are stored as files.
If you only see one storage called local, that's almost always a directory storage pointed at /var/lib/vz, and it usually has backups enabled by default on a fresh install.
Step 2: Run a manual backup from the GUI
Click on the VM or container in the left tree, then open the Backup tab. You'll see a mostly empty table the first time — that's fine, nothing has run yet.
- Click Backup now.
- Pick the storage you confirmed in Step 1.
- Choose a Mode: Snapshot, Suspend, or Stop (more on the difference below — Snapshot is the right default for most people).
- Pick a compression algorithm. Zstd is the modern default and the one I'd recommend unless you have a specific reason not to.
- Click Backup and watch the task log at the bottom of the screen.
For a small VM this takes a couple of minutes. A 500 GB Windows VM with a lot of used space can easily take twenty or thirty, depending on your disk and network speed.
Step 3: Understand the three backup modes
This part trips people up, so it's worth slowing down on.
| Mode | What happens | Downtime | Best for |
|---|---|---|---|
| Snapshot | VM keeps running; Proxmox uses live snapshot technology to copy a consistent point-in-time image | None, or a few seconds | Almost everything — the sane default |
| Suspend | VM is paused in memory, backup starts, then VM resumes | Short, but longer than snapshot | Storage that doesn't support snapshots well |
| Stop | VM is fully shut down, backed up, then powered back on | Full downtime for the backup duration | Maximum data consistency, e.g. before a risky in-guest change |
Snapshot mode is what almost everyone should use day to day. Stop mode is what I reach for right before doing something scary inside a VM, like a major distro upgrade, where I want a guaranteed-clean state to roll back to.
Step 4: Set up a recurring backup job
Manual backups are easy to forget. A scheduled job fixes that.
- Go to Datacenter → Backup and click Add.
- Set the Node (or leave it as "All" if you run a cluster and want the job to follow VMs across nodes).
- Set a Schedule — Proxmox uses systemd calendar syntax here.
Sun 03:00means every Sunday at 3 AM;*-*-* 02:00means every day at 2 AM. - Under Selection mode, choose specific VMs, or "All" if you want every guest on the node included automatically.
- Set Storage, Mode, and Compression the same way as the manual backup.
- Set retention under the Retention tab — this is where
prune-backupsoptions likekeep-lastandkeep-dailylive in the GUI.
A reasonable starting retention for a homelab is keep-last=3, keep-daily=7, keep-weekly=4. That keeps your three most recent backups, a rolling week of daily snapshots, and a month of weekly ones, without eating unlimited disk space.
Step 5: Run the same backup from the command line
Sometimes the GUI isn't available, or you want to script something. The vzdump command does exactly what the GUI does:
vzdump 100 --storage local --mode snapshot --compress zstdHere, 100 is the VM ID (find it in the GUI next to the VM's name). Swap --mode snapshot for stop or suspend if you need one of the other modes. For a container instead of a VM, the command is identical — vzdump handles both LXC and QEMU guests.
Step 6: Restore a VM from a backup
This is the step people skip until they desperately need it — don't be that person. Test a restore at least once before you actually rely on this.
- Go to the storage that holds your backup, open its Content tab, and find the backup file (it'll look like
vzdump-qemu-100-2026_07_11-14_30_00.vma.zst). - Click it, then click Restore.
- Choose a target storage for the restored disks and, if you want, a different VM ID so you don't overwrite the original.
- Click Restore and wait — this can take as long as the original backup did.
From the command line, the equivalent is:
qmrestore /var/lib/vz/dump/vzdump-qemu-100-2026_07_11-14_30_00.vma.zst 200 --storage local-lvmThat restores the backup into a new VM with ID 200, leaving the original VM 100 untouched. For containers, swap qmrestore for pct restore.
Commands Explained
A quick reference for the commands used above, since typing something you don't understand is how homelabs get broken.
vzdump 100— starts a backup of VM ID 100 using whatever defaults are configured; everything after this flag overrides those defaults for this one run.--storage local— tells vzdump which configured storage to write the backup file to.--mode snapshot— picks the backup mode:snapshot,suspend, orstop.--compress zstd— sets the compression algorithm. Zstd is fast and multi-threaded; gzip is slower but slightly more universally compatible; lzo is fast but compresses worse.qmrestore <file> <vmid>— restores a QEMU VM backup file into a new or existing VM ID.pct restore <vmid> <file>— the container equivalent of qmrestore.
Common Errors
"Backup failed - no space left on device" — your backup storage ran out of room mid-job. Check free space with df -h on the storage's mount point, and tighten your retention settings or add more disk.
"could not get lock '/var/run/vzdump.lock' - got timeout" — another backup job is already running against the same guest. Wait for it to finish, or check ps aux | grep vzdump for a stuck process.
"unable to open file '...' - Permission denied" — usually an NFS or CIFS storage with the wrong permissions or a squashed root user. Check the export options on the NFS server side, particularly no_root_squash.
"VM is locked (backup)" when trying to start or edit a VM mid-backup — this is normal and clears itself once the job finishes. If it doesn't, run qm unlock <vmid>, but only after confirming no backup is actually still running.
Troubleshooting
If a backup job silently didn't run, check Datacenter → Backup, click the job, and look at its log history — the schedule syntax is easy to get wrong, and a typo there just means the job never fires with no obvious warning.
If a snapshot-mode backup fails with something about volumes not supporting snapshots, you've likely got a mix of storage types attached to one VM — for example, a disk on ZFS and another on plain LVM. Either move everything to snapshot-capable storage, or exclude the non-snapshot disk from the backup under the VM's Backup settings.
Slow backups over NFS are almost always a network or NFS server bottleneck, not Proxmox. Run a quick dd write test to the NFS mount directly and compare it against your backup throughput before assuming Proxmox is the problem.
Best Practices
- Follow the 3-2-1 rule where you reasonably can: three copies of your data, on two different types of media, with one copy off-site.
- Test a restore periodically, not just once when you set things up. A backup you've never restored is a backup you're only hoping works.
- Keep retention settings tight enough that backups don't silently fill your storage — check free space monthly if you're not monitoring it automatically.
- Use Stop mode before major in-guest changes like OS upgrades, even if Snapshot is your everyday default.
- If you're backing up more than a couple of VMs regularly, look into Proxmox Backup Server — the deduplication alone tends to pay for the extra setup time.
Frequently Asked Questions
Does Proxmox back up running VMs without downtime?
With Snapshot mode, yes — the VM keeps running through the entire backup with at most a brief pause at the start.
Can I back up to an external USB drive?
Yes. Mount it as a directory storage under Datacenter → Storage, enable the Backups content type, and use it like any other target.
How long are backups kept by default?
Forever, unless you set retention rules. Without a prune policy, every backup you run stays until you delete it manually or fill the disk.
Is a snapshot the same thing as a backup?
No. A snapshot lives on the same storage as the VM and won't survive a disk failure. A backup is a separate, portable copy — treat snapshots as an undo button, not a safety net.
Do I need Proxmox Backup Server to use backups at all?
No. Plain directory or NFS storage works fine with vzdump. PBS is an upgrade for deduplication and incremental-style backups, not a requirement.
Conclusion
Backups are one of those things that feel like busywork right up until the moment they save you hours of pain. Get one manual backup working, then turn it into a scheduled job so it happens without you thinking about it.
The last step matters more than people expect: restore something on purpose, before you ever need to for real. That's the only way to know your safety net actually holds weight.