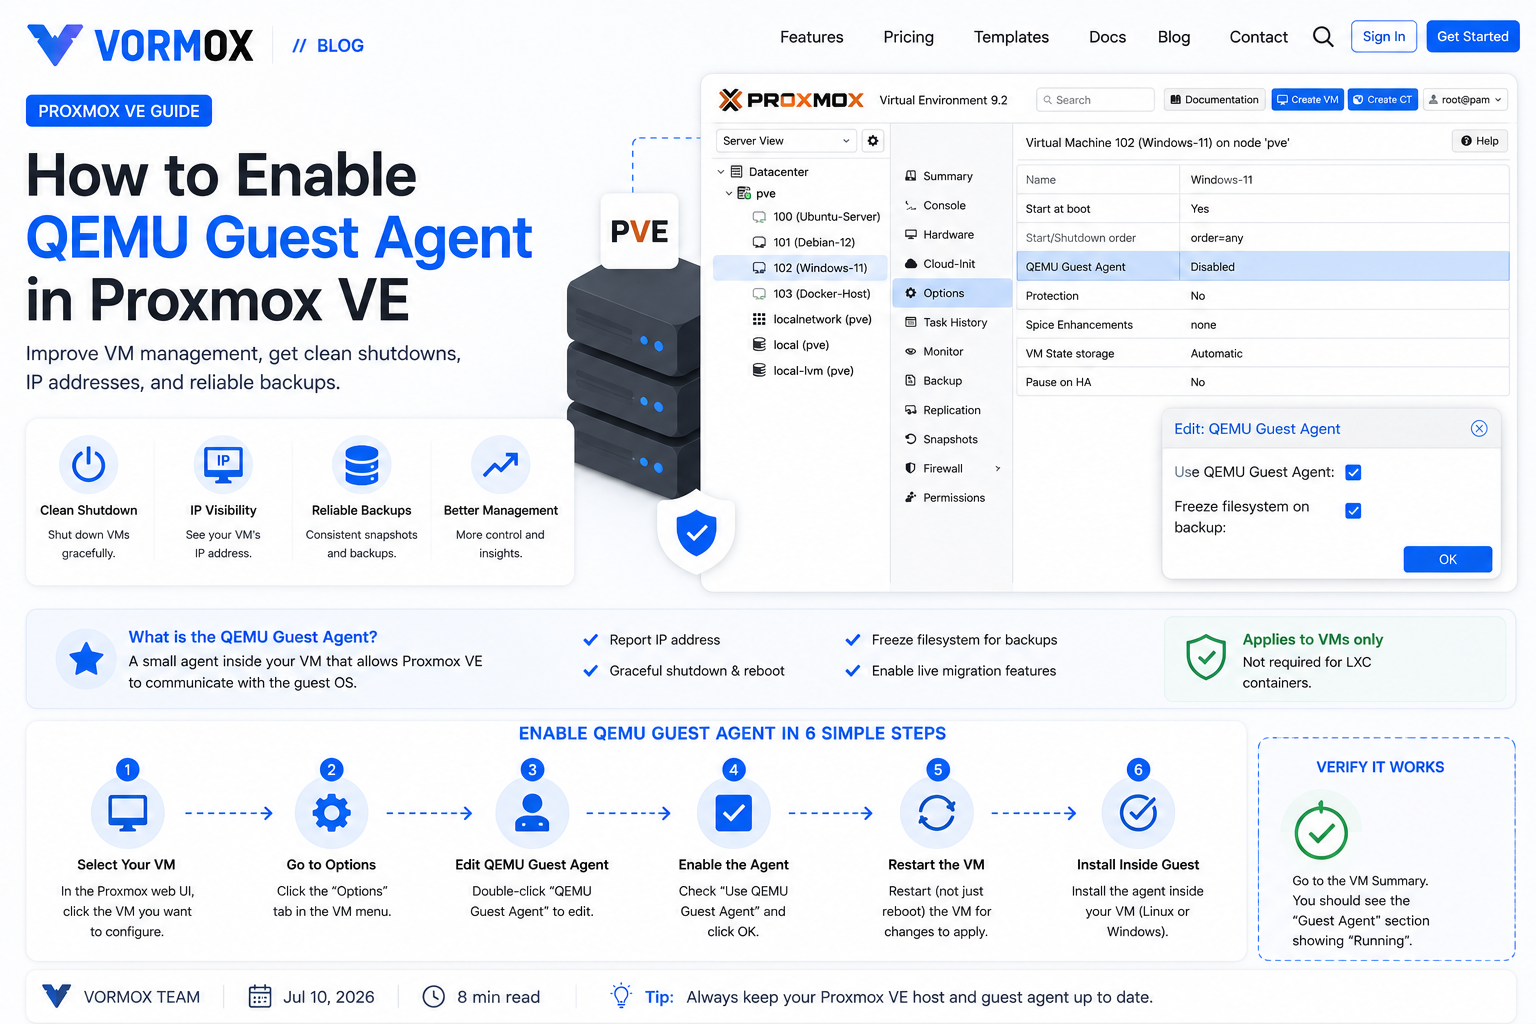
You create a new VM in Proxmox, install Ubuntu, and everything looks fine — until you glance at the Summary tab and the IP address field just says nothing. Or you click Shutdown and the VM sits there for two full minutes before Proxmox gives up and asks if you want to pull the plug on it. Both of these are the same root cause, and it's one of the first things every new Proxmox user runs into: the QEMU Guest Agent isn't installed or isn't talking to the host.
This one is small, easy to fix, and genuinely worth doing on every VM you build from here on. Let's get it sorted properly.
What You Will Learn
- What the QEMU Guest Agent actually is and what it does behind the scenes
- Why a VM without it behaves differently from one that has it running
- How to turn it on in the Proxmox GUI and from the command line
- How to install it inside Linux and Windows guests
- How to confirm it's actually working, not just installed
- The errors people hit most often, and how to get past them
What Is This Feature?
The QEMU Guest Agent is a small background service that runs inside a virtual machine and gives the Proxmox host a direct channel into the guest's operating system. Without it, Proxmox only sees the VM from the outside — CPU usage, memory, disk I/O — the same way you'd watch a sealed box from across the room.
With the agent installed, Proxmox can ask the guest OS questions and get real answers. What's your current IP address? Can you flush your filesystem buffers so we can take a clean snapshot? Would you please shut yourself down cleanly instead of being forcibly powered off? On Proxmox VE 9.2, this communication travels over a virtio-serial channel, not the network, so it works even if the VM has no network access at all.
It's worth being precise about one thing: the guest agent is not a monitoring agent, and it's not the same as VirtIO drivers (those are separate drivers that make disk and network I/O faster inside the VM). It's a narrow, purpose-built helper for a handful of host-to-guest operations.
The channel it uses matters more than it sounds like it should. Because the communication rides over a virtual serial port rather than the network stack, it keeps working even when a VM's network interface is down, misconfigured, or firewalled off entirely. That's the reason a fresh VM with no network access yet can still report basic status back to Proxmox once the agent is installed and running.
Why Would You Use It?
Three everyday annoyances go away once the agent is running:
- Clean shutdowns. Clicking Shutdown in the Proxmox GUI sends a real signal to the guest OS to close applications and unmount cleanly, instead of yanking power like an ACPI-less VM does.
- Accurate IP reporting. The Summary tab and the
qm guest cmdoutput will actually show the VM's current IP address, which is handy when you're managing a dozen VMs and don't want to log into each one just to find its address. - Consistent backups and snapshots. Before a snapshot or backup runs, the agent can freeze the guest's filesystem for a split second so the data on disk is consistent, then thaw it right after. Without this, you're relying on crash-consistent backups, which usually work fine but occasionally don't — especially with databases.
None of this is mandatory. Plenty of homelab VMs run for years without the guest agent and nobody notices. But if you're backing up anything that matters, or you manage more than two or three VMs, it pays for itself the first time you need it.
Prerequisites
Before starting, make sure you have:
- A working Proxmox VE installation — these steps apply to 8.x and 9.x, since the agent workflow hasn't changed between those releases
- At least one VM already created (Linux or Windows), either running or stopped
- Root or admin access to both the Proxmox host and the guest OS inside the VM
- Internet access inside the guest, so it can install the
qemu-guest-agentpackage - For Windows guests, the virtio-win driver ISO downloaded ahead of time — grab it from the Fedora project's virtio-win releases page
Step-by-Step Tutorial
There are two sides to this: telling Proxmox to expect the agent, and actually installing the agent inside the guest. Skipping either half leaves you half-fixed — enable it on the host but skip the guest install, and Proxmox will just wait around for a response that never comes.
Step 1: Enable the Agent Option on the VM
In the Proxmox web interface, click your VM in the left-hand tree, then go to Options. Find the row labeled QEMU Guest Agent, click Edit, and tick the checkbox. Click OK.
If you'd rather use the shell, SSH into your Proxmox host and run:
qm set 101 --agent enabled=1Replace 101 with your actual VM ID (you'll see it next to the VM name in the GUI). If you also want Proxmox to trim cloned disks automatically using the agent's freeze/thaw support, add that flag too:
qm set 101 --agent enabled=1,fstrim_cloned_disks=1Step 2: Reboot the VM
This setting attaches a virtual serial device to the VM's hardware, and that only happens on a fresh start — a plain reboot from inside the guest OS won't pick it up. Stop the VM fully and start it again, either from the GUI or with:
qm stop 101
qm start 101
Step 3: Install the Agent — Debian or Ubuntu Guests
Inside the VM, open a terminal and run:
apt update
apt install -y qemu-guest-agent
Then start it and set it to launch on every boot:
systemctl enable --now qemu-guest-agentStep 4: Install the Agent — RHEL, Rocky, or AlmaLinux Guests
dnf install -y qemu-guest-agent
systemctl enable --now qemu-guest-agent
Step 5: Install the Agent — Windows Guests
Windows needs a couple more clicks because the virtio-serial driver isn't built in.
- Attach the virtio-win ISO to the VM (in the GUI: Hardware > Add > CD/DVD Drive, point it at the downloaded ISO)
- Open Device Manager inside Windows — you should see PCI Simple Communications Controller with a warning icon
- Right-click it, choose Update driver, browse to the ISO, and let it search the matching Windows version folder
- Open the ISO in File Explorer, go into the guest-agent folder, and run either qemu-ga-x86_64.msi or qemu-ga-i386.msi depending on your Windows architecture
Once installed, confirm the service is running from an elevated PowerShell prompt:
Get-Service QEMU-GAStep 6: Confirm It's Actually Working
Back on the Proxmox host, ping the agent directly:
qm agent 101 pingNo output means success — the command returns silently when the agent responds. Give the Summary tab a refresh too; the IP address field should now show the guest's real address instead of sitting blank.
Commands Explained
| Command | What it does |
|---|---|
qm set 101 --agent enabled=1 | Tells Proxmox this VM has a guest agent and attaches the virtio-serial channel it needs |
qm stop 101 / qm start 101 | Fully powers the VM off and on, which is required for new virtual hardware to appear |
apt install -y qemu-guest-agent | Installs the agent package on Debian-family Linux guests without prompting for confirmation |
systemctl enable --now qemu-guest-agent | Starts the agent immediately and sets it to start automatically on every future boot |
qm agent 101 ping | Sends a test message to the guest agent and checks whether the guest responds |
Get-Service QEMU-GA | Checks the Windows service status for the guest agent from PowerShell |
Common Errors
A few messages show up constantly on the Proxmox forums, and almost all of them trace back to the same handful of causes.
"QEMU guest agent is not running" in the Summary tab, even though you installed it. Nine times out of ten, this means the VM was never fully restarted after you enabled the agent option — the virtio-serial device simply isn't attached yet.
VM shutdown hangs, then Proxmox shows a timeout. This happens when the agent option is enabled on the host side but the package was never actually installed (or was installed and then removed) inside the guest. Proxmox waits for a response from an agent that doesn't exist.
Windows Device Manager still shows an unknown device after installing virtio-win. Usually the driver update pointed at the wrong subfolder — make sure you picked the folder matching your exact Windows version (Windows 10 and Windows 11 have separate folders on the ISO, and it's an easy one to mix up).
Troubleshooting
If qm agent 101 ping returns an error instead of going quiet, work through these in order:
- Confirm the service is actually running inside the guest —
systemctl status qemu-guest-agenton Linux, orGet-Service QEMU-GAon Windows - Check that the VM was fully stopped and started (not just rebooted) after you enabled the agent option
- Run
qm config 101on the host and look for a line containingagent: enabled=1— if it's missing, the setting didn't save - On Linux, check
journalctl -u qemu-guest-agentfor startup errors — a corrupted package install is rare but it happens - As a last resort, remove and reinstall the package:
apt remove --purge qemu-guest-agent && apt install qemu-guest-agent
I've seen the "not fully restarted" mistake trip up experienced admins too, not just beginners — it's an easy step to skip because everything else about enabling the option feels instant.
Best Practices
Turn the guest agent on as a habit every time you build a new VM, right when you create it, rather than bolting it on later. It costs nothing and saves you a restart down the line.
If you're cloning VMs from a template, enable fstrim_cloned_disks=1 alongside the agent option — it tells Proxmox to trim unused blocks on the clone's disk automatically, which keeps thin-provisioned storage from bloating over time.
Keep the agent package updated the same way you update the rest of the OS. It's a small package and updates are infrequent, but running a stale version is the kind of thing that never causes a problem until the one time it does, usually during a backup at 3 AM.
Think about the freeze/thaw window when you schedule backups on anything write-heavy, like a database VM. The freeze itself only lasts a moment — long enough for the guest to flush buffers to disk — but a VM already struggling under heavy I/O will feel that pause more than an idle one. Scheduling backups outside peak hours avoids stacking that brief freeze on top of an already busy disk queue.
Don't enable the agent option on a VM and then forget the guest-side install — half-configured is worse than not configured, because now Proxmox is waiting on something that will never answer.
Frequently Asked Questions
Do I need the QEMU Guest Agent for every VM?
No. It's optional, and plenty of simple VMs run fine without it. It matters most for VMs you back up regularly or manage remotely by IP.
Will enabling it slow my VM down?
No. The agent is lightweight and sits idle until Proxmox actually asks it something, which isn't often.
Does LXC need the guest agent too?
No. LXC containers share the host's kernel directly, so there's no separate guest OS for an agent to run inside — the QEMU Guest Agent is specific to full VMs.
I enabled the option but the VM won't boot anymore. What happened?
That's not related to the guest agent — a VM that won't boot after an unrelated change is almost always a separate issue (boot order, disk controller, or a config typo). Check qm config <vmid> for anything else that changed at the same time.
Can I install the agent without a Proxmox restart?
You can install the package inside the guest anytime. But the host-side virtio-serial device only attaches on a full VM stop/start, so the connection won't work until you do that once.
Does this work on Proxmox Backup Server too?
Yes — when PBS triggers a backup through Proxmox VE, the same guest agent freeze/thaw mechanism kicks in if it's enabled on the VM, giving you filesystem-consistent backups rather than crash-consistent ones.
Why does the summary tab sometimes show an old IP address after I change it?
The agent reports whatever the guest OS currently has assigned. If you changed the IP inside the guest but haven't renewed the network config or rebooted the interface, the agent is just accurately reporting stale data — not the other way around.
Conclusion
Ten minutes of setup buys you clean shutdowns, accurate IP addresses in the dashboard, and backups you can actually trust. It's one of those settings that feels optional right up until the day a backup restore saves you, and you're glad the filesystem was frozen cleanly instead of caught mid-write.
Make it part of your normal VM checklist — enable the option, install the package, restart once — and you won't have to think about it again.